Wednesday, April 30, 2014

Soap Saver Pattern and Giveaway Winner Announced.

A few weeks ago I shared a Soap Saver Pattern and an opportunity to win a bar of awesomeness from The Soap Engineers. Congrats to "Barb" your name was selected! I've sent you a message. 
If you missed out, stick around I will be doing another giveaway soon! In the meantime check out the free pattern and check out the cool soaps and scrubs you can get from this brand new company!
Tropical Retreat soap from The Soap Engineers.


Tuesday, April 29, 2014

They've Gone Mad and Other Crochet Related Tid Bits

Mad Hatter Entry.
Mad Hatter Challenge Top Choices Announced

The Crochet Crowd posted the Top 15 Hats on their blog yesterday. Today they announced an additional 5 for a Hawt Off The Hook Award. You can find all 20 pinned on my Pinterest Board:  Mad Hatter Top 15 Top Hats - Plus 5!

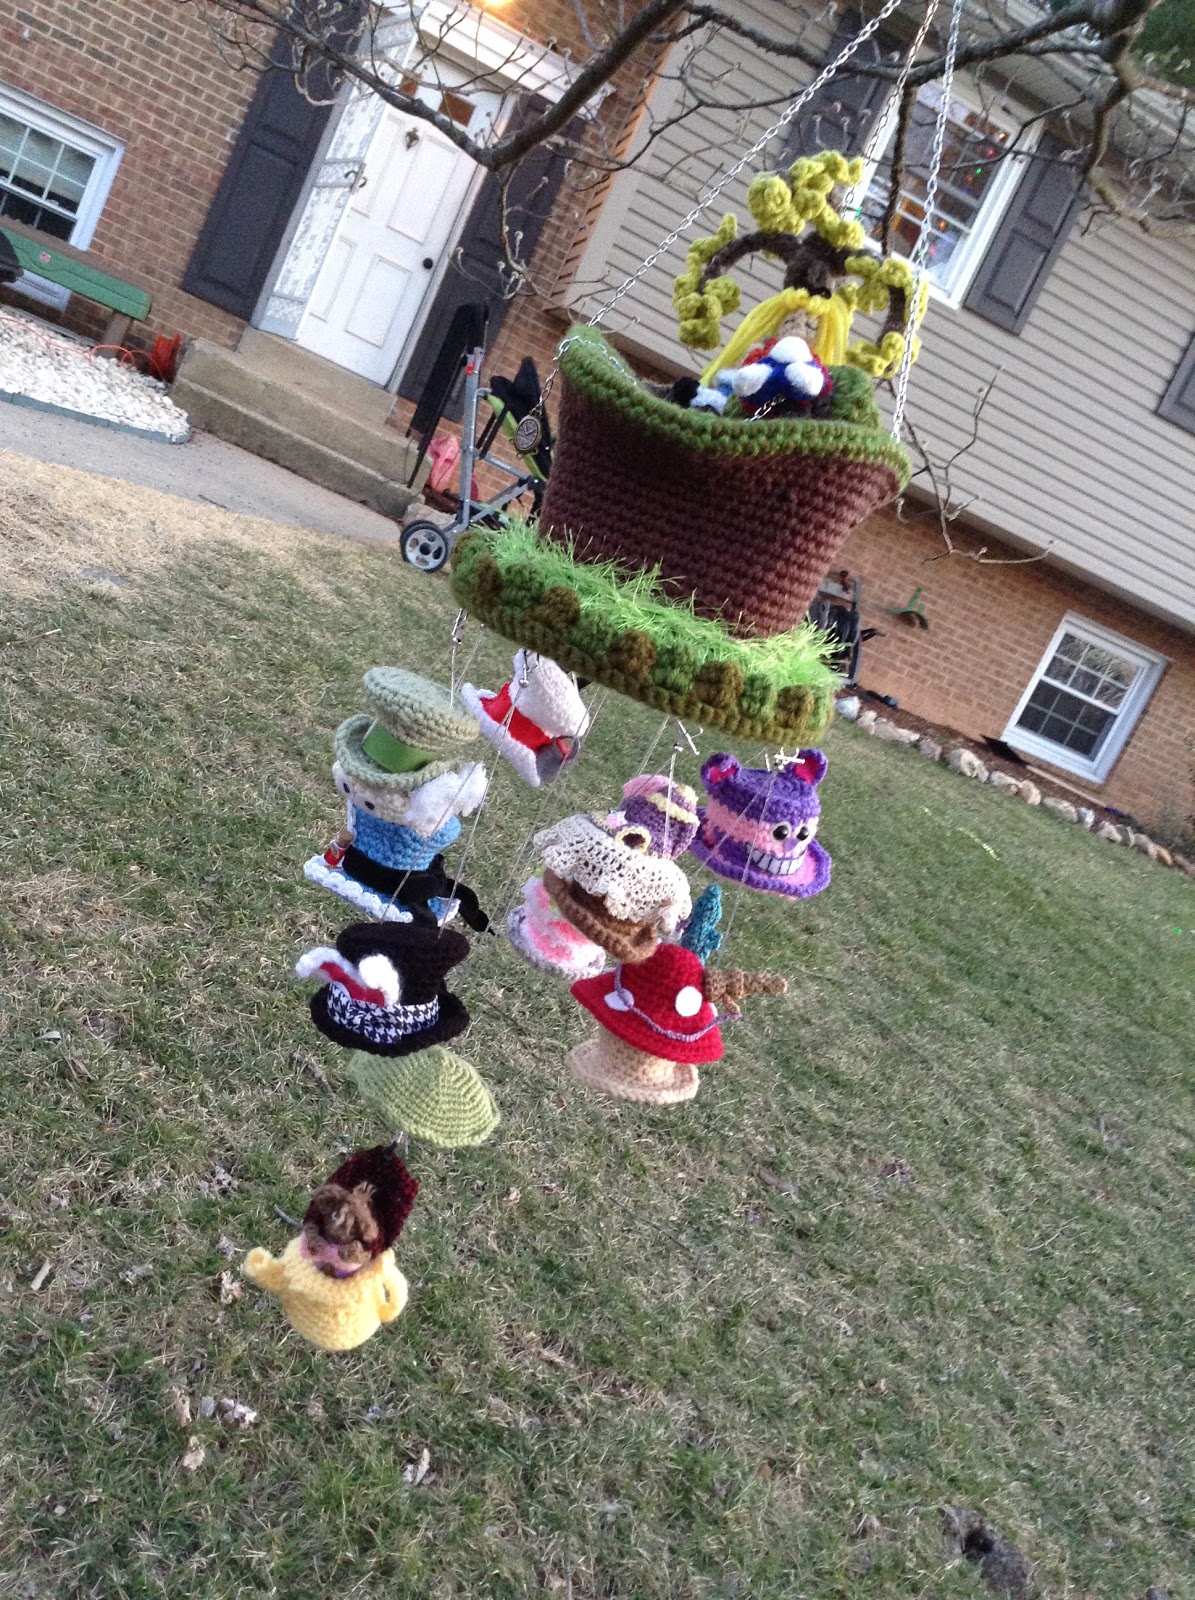
I was super surprised, and excited to learn that my Mad Hatter entry had made the top 15! I had never expected it to gain any significant attention. There were some super amazing hats. You can see all of the entries HERE.

You can just about imagine my surprise when they announced the 5 additional hats today and my mobile hat was announced. I was elated to say the least. And to be categorized with the other four amazing hats was a privilege. The talent level in this competition was mind blowing. I am so glad I took a chance and put myself out there for this one!

There have been several requests for the pattern for the base hat used in the challenge. If you would like to try your hand at creating an Alice in Wonderland Themed hat start with the Red Heart Top Hat Pattern.

In Other News
I'm excited to announce that I will be blogging over at Knot Just Yarn Blog as a Guest Blogger for The Crochet Crowd. They introduced the four new bloggers yesterday that will be contributing to the blog.

New Guest Bloggers For The Crochet Crowd

The Tennessee Stitch - Daniele Dyer (She has already been contributing for about a year)
Untangling The Yarn - Bobbie Asche
Chit & Chat with Anabela - Anna Zetterberg
Hooked on Ewe - Sheri Goad

My first blog as a guest blogger was posted today. Check it out and find out what your crochet personality is.

What Kind of Hooker Are You? Crocheter Personality Comparisons

Casting off until the next time we hook up,
Sheri


Monday, April 21, 2014

The Mad Hatter's Challenge

The Crochet Crowd put out a challenge in January. The challenge was to use the Red Heart Top Hat as your base,  and theme it to Alice in Wonderland. Really, the only guideline was you had to incorporate the original pattern base into your design. Beyond that, the possibilities were endless! Nowhere did it say you had to be able to wear the hat!

You can check out  all of the fantabulous designs in The Mad Hatter Gallery
(Scroll Down for Additional Views of some of the hats!)

"All hats submitted for The Crochet Crowd exhibit will be part of an all new fundraiser, with all proceeds going towards creating Educational Awards for Fashion Design Students in Ontario, Canada. Visit the Crochet Crowd Booth #153 on Saturday, April 26th The bidding is from 9 am - 7 pm Friday and Saturday from 9 am - 2pm... the bidding needs to be all in by 2pm on the Saturday!"

My mind was swirling with ideas I wanted to try. Every time I started a hat I would get side tracked with another idea. The only way to move on was to make them all! Since I knew time wouldn't allow me to do this, I decided to make them all mini and incorporate them into one design. I ended up submitting three hats. Two more basic designs that I ended up duplicating and using in my third entry as well, a mobile!


Hat 1: The Unbirthday Cake Hat


Hat 2: The Mad Hatter


Hat 3: Alice's Dream Mobile


I feel sorry for the judges on this one! There are some super talented crocheters out there with imaginations that took us on an entirely new adventure through wonderland!!

Another View

There are some really fabulous hats out there. So much talent. I have found others who have been sharing another view of their creations. I decided to try and start a collection of them all in one place. For those who are as excited as I am to see the Alice story unfold in the world of crochet!
Jacqueline Holland
Heather Navarro

Misty Samuelson
Melissa Wolcott

April Ramirez
Alison Schieltz 
Close up View on Alison's Tumblr
Krystal Ladwig


Sherry Maye Hat 1

Sherry Maye Hat 2

Wednesday, April 9, 2014

Summer Stroll Cinch Pouch w/ Removable Shoulder Strap

Cathy, from The Crochet Crowd, challenged us to post a selfie with our current work in progress today. So I obliged. This is the lovely mugshot I posted...I was working on a pouch that I could throw in my crochet bag with my wallet, keys and sunglasses, and use while I'm out walking, site seeing or even shopping. With the addition of a removable shoulder strap, I'm hoping this does the trick!

I received a lot of requests for the pattern...but the project needed to be finished. So, I spent the afternoon finishing up the strap and managed to get the pattern written up tonight. I did rush a bit to get this out there for you guys, so let me know if you get confused or if something doesn't seem right. And please...share pics and/ or post a link if you post it somewhere! I will be linking the pattern to Ravelry so please post your projects there if you are so inclined. I'd love to see what you do with the pattern.


Materials:

4.5 oz Lily Sugar'n Cream Ecru (Any worsted weight cotton will work)
Size I Hook
Tapestry needle
2 buttons - about dime size

Special Stitch: Puff Stitch: yarn over and pull through leaving loops on the hook, repeat four more times. You should have 11 loops on your hook. Yarn over pull through all loops.


Pouch:
8 hdc in a magic ring. Join. Ch 2
Row 1: 2 hdc in each stitch space around
Row 2: 1 hdc in first stitch space, 2 in next. Repeat around. Join. Ch 2.
Row 3: 1 hdc in first 2 stitch spaces, 2 in next. Repeat around. Join. ch 2.
Row 4: 1 hdc in first 3 stitches, 2 in next. Repeat around. Join. ch 2.
Row 5:  hdc around in back loop only. Join, ch 2.
Row 6:  hdc in each stitch space around. Join. Ch 2
Row 7: hdc in first stitch space, puff stitch in next. Repeat around. Join ch 2.
Row 8: hdc in each stitch space around. Join. ch 2
Row 9: dc in each stitch space around. Join. ch 2
Row 10: hdc in each stitch space around. Join. ch 2.
Row 11: hdc in first stitch space, puff stitch in next. Repeat around. Join ch 2.
Row 12: hdc in each stitch space around. Join. ch 2
Row 13: dc in each stitch space around. Join. ch 2
Row 14-15 hdc in each stitch space around. Join. ch 2.
Row 16:  dc in each stitch space around. Join. ch 2
Row 17: hdc in each stitch space around. Join. ch 2.
Row 18: hdc in first stitch space, puff stitch in next. Repeat around. Join ch 2.
Row 19: hdc in each stitch space around. Join. ch 2
Row 20: dc in each stitch space around. Join. ch 2
Row 21: hdc in each stitch space around. Join. ch 2.
Row 22: dc in first stitch space, ch 1, skip one stitch space, repeat around. Join. Ch 3
Row 23: slip stitch into first chain space, ch 3, slip stitch into next chain space. Repeat around. Tie off and weave in ends.


Tie Cord:
Tightly chain a cord long enough to string through the spaces in Row 22, and give a desired amount extra for tying.

Shoulder Strap:
Chain 175
Row 1: sc in the backpost of your chain across. Ch 1 and turn.
Row 2: sc in each stitch across. Ch 2 and turn.
Row 3: dc in first 6 stitches, puff stitch in next. Repeat across 24 times. Dc in the next6 stitches. Ch 2 and turn.
Row 4: sc in each stitch across. Ch 2 and turn.
Row 5: sc in each stitch across. Tie off and weave in ends.

Attach buttons on the back side of the strap. Placement is on the third dc above the first puff stitch on each end.

To attach shoulder strap, fold end of strap over lengthwise and slip through a space in Row 22. About 1/q4 of the way around from where you have your tie. Button it by slipping the button between the 1st and 2nd dc on the end of the strap.


Monday, April 7, 2014

Mini Treat Basket

I worked up this mini basket last night . It was one of those kind of by accident things I ended up falling in love with it!  It's perfect for those little spring treats.  I used Sugar'n Cream Scents Fluer De Lavande.  It didn't even use 1/2 of the 3oz. Skein. I've posted the pattern below. I hope you enjoy it as much as I do!

Mini Treat Basket

Materials:
Any worsted weight cotton  1 skein should do two baskets.
Size I Hook
Tapestry needle

Special Stitch: Puff Stitch: yarn over and pull through, repeat two more times. You should have 7 loops on your hook.  Yarn over pull through all loops.

8 hdc in a magic ring. Join. Ch 2
Row One: 2 hdc in each stitch around
Row Two: 1 hdc in first stitch, 2 in next. Repeat around. Join ch 2.
Row Three: Hdc around in back loop only. Join ch 2.
Row Four:  Hdc in first stitch, puff stitch in next, repeat around. Join ch 2
Row Five: Hdc in each stitch around. Join ch 2.
Row Six: Puff stitch in first stitch, hdc in next. Repeat around. Join ch 2. (Your puff stitches should be staggered with your first row of puff stitches.
Row 7-8: hdc around. Join ch 1.
Row 9: Reverse sc around. Join and tie off.

Weave in ends.

Handle:
Chain 15
 3 DC in first stitch, slip stitch in next. Repeat to the end and do the same down the opposite side of the chain. Tie off and attach to the basket with a tapestry needle.

Saturday, April 5, 2014

Soap Saver

Last weekend The Soap Engineers debuted at a Vendor Fair in Virginia. I had the opportunity to test out many of their goodies! My favorite was their Honey Almond, which they sold out of! No surprise. I did get to take several other great things home, including Tropical Retreat. You can be certain I put an order in for the Honey Almond!
The soaps are so heavenly, I didn't want to waste an ounce by leaving them on the bathtub or in a soap dish. I have seen several crocheted soap holders so I decided to whip one up for my new soaps!  They are a bit bulkier than a standard bar of soap so this pattern accommodates the size.


Materials:
2oz  cotton yarn  (Picture used Sugar'n Cream Ecru)
K hook  6.5 mm
Tapestry needle

Ch 12
hdc in second chain from the hook. Repeat across.
Continue on the opposite side of the chain until you reach your first hdc. 
Join and chain 2.
Continue around working hdc into each stitch until you have completed 16 rounds.
Work in the rounds and do not join until the last row.
On the 16th round join and ch 2.
Hdc in the next stitch and chain one. Skip the next stitch. Continue around. Join and tie off. Weave in ends. 
Chain 60 to use as your tie. Weave it in and out of your last row and tie at the ends.

Add your favorite soap and enjoy! Use the drawstring to hang over the shower head when you are finished so the soap and soap saver can dry.

Just For You!
Giveaway...
You could win the Tropical Retreat Soap and Soap Saver pictured above!!

Here's what to do. 
1. Go over to The Soap Engineers Facebook Page  and like their page. 
2. For a second entry go over to The Soap Engineers Etsy Shop and take a look at what they have. 

Comment here and let me know you liked the page and tell me what item on their Etsy page is your favorite. I will give you one entry for each task completed.

I will draw a random winner from the comments on this post on April 14th!


Tuesday, March 11, 2014

Awareness Ribbon Water Bottle Cozy

MS Awareness Water Bottle Cozy
MS (multiple sclerosis) is not new, but the battle is new for some. My friends daughter was recently diagnosed at 22. I have several very good friends who have been battling it for years. It is heartbreaking to watch someone you love suffer and not be able to do anything about it! As a way to help my friend raise funds for her daughter's first MS walk since she was diagnosed, I made up this Water Bottle Cozy pattern. The cozies will be used as part of an auction.
There are so many causes out there, this pattern can be used for any of them by changing up the colors of the ribbon.  The base is simple, and really, you could use any appliqué pattern on it. Enjoy!

Wikepedia has a list of what colors are used for what cause. Ribbon Color Chart

Awareness Ribbon Water Bottle Cozy

Two colors of cotton yarn.
I used Sugar'n Cream. It takes about an ounce of the main color and less than 1/2 an ounce for the ribbon color.

Hook Size: J hook

Chain 2
Row 1: 8 hdc in 2nd chain from hook. Join with slip stitch, chain 1.
Row 2: 2 hdc in each space around. Join with slip stitch, chain 1.
Row 3: 1 hdc in first space, 2 hdc in next. Repeat around. Join with slip stitch, chain 1.
Row 4: 1 hdc in back 2 loops only around. Do not join.
Row 5-20: Work these rows in the round. 1 hdc in each space around.
On last stitch of row 20, join with a slip stitch bringing in color B.
Row 21: chain 1, sc in each space around. Join and tie in ends.

Awareness Ribbon

Chain 30
Row 1: sc in the loop on the back side of the chain across. Chain 1 and turn.
Row 2: sc in each stitch across. Tie off the end leaving enough yarn to sew ribbon onto the cozy.

Place the ribbon folded over where you want it on the cozy. Stitch around to secure it in place. Tie in ends.

( I placed the cozy on the bottle and sewed the ribbon on. Seemed to keep it better placed that way.)

Wednesday, February 5, 2014

Neon Fiesta - Reflective Toddler Beanie

This week I celebrated my 20th wedding anniversary. While out on a weekend excursion, dear hubby displayed one of the many reasons we are still married...he loves me to the moon and back...or in this case to Hobby Lobby and back! Since we don't have a store in our area, he stopped at one we found while we were out. Let me tell you, a man who is willing to happily yarn shop with you is definitely a man worth keeping around for 20 years!
I had heard Hobby Lobby carried their own brand of Reflective yarn and I was anxious to give it a try. Paired with the neon yarn, I made Neon Fiesta. A fun toddler hat that's reflective too. Unlike the Red Heart Reflective that's a 5 bulky weight, I Love This Yarn Reflective is a 4. It made for a lighter weight hat as well. I actually kind of love this yarn. It was not splitty at all, and minus the unavoidable scratchiness of the reflective strand, it was quite soft.
 

Neon Fiesta (Reflective Toddler Hat)

Materials:
I Love This Yarn
1 Skein Neons - Bright Neon
1 Skein Reflective - Yellow Glow
(Each skein will make three hats.)

I hook
Tapestry needle for working in ends

Gauge:
6 DC = 2 in.
5 rows = 2 in.

DC - Double Crochet
SC - Single Crochet
Join - (Join the end of each round by slip stitching into the top of the first Double Crochet

Start with Magic Ring, Chain 2
Row 1:  8 DC in Magic Ring, join. Chain 2
Row 2: 2 DC in each stitch and join. Chain 2.
Row 3: 2 DC in first stitch 1 DC in next stitch, Repeat until you have come back around and join at the top of your first DC. Chain 2.
Row 4:  2 DC in first stitch 1 DC in next 2 stitches, Repeat until you have come back around and join at the top of your first DC. Chain 2.
Row 5:  2 DC in first stitch 1 DC in next 3 stitches, Repeat until you have come back around and join at the top of your first DC. Chain 2.
Row 6:  2 DC in first stitch 1 DC in next 4 stitches, Repeat until you have come back around and join at the top of your first DC. Chain 2.
Row 7:  2 DC in first stitch 1 DC in next 5 stitches, Repeat until you have come back around and join at the top of your first DC. Chain 2.
Row 8- 12: DC in each stitch around, joining and chaining 2 after each round.
Row 13: DC in each stitch around, join and bring in yellow glow yarn. Chain 2
Row 14: DC  in each stitch around, join and chain two.
Row 15: HDC in first stitch, FPDC in next. Continue this pattern around. Join and chain two.
Row 16: Repeat row 15. Make sure the FPDC and the HDC line up with each other. Join and chain one.
Row 17: SC in each space around. Tie off and weave in ends.


Make a Pom Pom out of the Yellow Glow and tie it onto the top through the stitches of the Magic Ring.

Thursday, January 16, 2014

Starry Night Reflective Beanie

Red Heart has come out with an exciting new yarn called Reflective.  Right now, it is pretty hard to come by.  I happened to be in the right place at the right time and managed to get ahold of some. For the most part, I am loving it. It is a bulky weight yarn. (5) I love the way the weight of it feels. So, maybe that doesn't make total sense, but it has a comfortable heaviness to it. The reflective thread, woven into the skein, creates an amazing effect when it's hit with light. (You can see it in the picture when the hat is photographed with a flash.)
While I am generally thrilled with this yarn, a few thing warrant a mention. I would not recommend this yarn for small children, or hats for bald people, unless you plan on lining your project. The reflective strand is just a bit scratchy. Secondly, the skeins I have worked with so far, about six of them, have been very difficult to pull from the center. I have had to pull quite a chunk from the center to find the start. One skein in particular was so difficult to get to I ended up unwinding the entire skein to get it untangled. Lastly, and probably most discouraging, is that I have found at least one section of yarn on each skein where there was a knot attaching the yarn together, and a few spots the yarn was a bit "puffy" ar freyed looking. I have been fortunate so far that it has worked into the back of my project. However, I have heard nothing but good about Red Heart's customer service and feel if I contact them with concerns they'll make it right.
The pros far out weigh the cons as far as I am concerned. I will keep purchasing and keep using it!

Starry Night Beanie


Materials:
Red Heart Reflective
1 Skein Black
1/2 Skein Grey
J hook
Tapestry needle for working in ends

Gauge:
6 DC = 2 in.
4 rows = 2 in.

DC - Double Crochet
SC - Single Crochet
Join - (Join the end of each round by slip stitching into the top of the first Double Crochet

Work rows as follows: Start with black for first three rows. Switch to grey on Row 4 and Row 5, back to black for four rows and back to grey for Row 10 and Row 11, then back to black for the remainder of the hat.

Start with Magic Ring, Chain 2
Row 1:  9 DC in Magic Ring, join. Chain 2
Row 2: 2 DC in each stitch and join. Chain 2.
Row 3: 2 DC in first stitch 1 DC in next stitch, Repeat until you have come back around and join at the top of your first DC. Chain 2.
Row 4:  2 DC in first stitch 1 DC in next 2 stitches, Repeat until you have come back around and join at the top of your first DC. Chain 2.
Row 5:  2 DC in first stitch 1 DC in next 3 stitches, Repeat until you have come back around and join at the top of your first DC. Chain 2.
Row 6:  2 DC in first stitch 1 DC in next 4 stitches, Repeat until you have come back around and join at the top of your first DC. Chain 2.
Row 7:  2 DC in first stitch 1 DC in next 8 stitches, Repeat until you have come back around and join at the top of your first DC. Chain 2.
Row 8- 15: DC in each stitch around, joining and chaining 2 after each round.
Row 16: SC in each stitch around, join and tie off.

Use a tapestry needle to weave end threads into the hat.

For a slouchier hat, The length of this hat can be adjusted by adding additional rows before you add the row of SC.

Wednesday, January 15, 2014

USA Peak - My Mountain Series

Along with some other fantabulous designs, another of my hat patterns has been released in the My Mountain Hat Series. USA Peak is a fun hat that is easy to work up and a great way to support Team USA in the Olympics. What's even better, you can get it for free! Plus, there are some other really cool hats! Check out USA Peak and the other great, free patterns at My Mountain.

Total Pageviews