Come visit me @ FroggingAlong.com
A little bit of everything crochet...My favorite sites, free patterns and other crochet related tid bits. Grab some coffee, a hook and some yarn, sit back relax and enjoy.
Showing posts with label crochet. Show all posts
Thursday, May 1, 2014
Tuesday, April 29, 2014
They've Gone Mad and Other Crochet Related Tid Bits
Mad Hatter Challenge Top Choices Announced
The Crochet Crowd posted the Top 15 Hats on their blog yesterday. Today they announced an additional 5 for a Hawt Off The Hook Award. You can find all 20 pinned on my Pinterest Board: Mad Hatter Top 15 Top Hats - Plus 5!
You can just about imagine my surprise when they announced the 5 additional hats today and my mobile hat was announced. I was elated to say the least. And to be categorized with the other four amazing hats was a privilege. The talent level in this competition was mind blowing. I am so glad I took a chance and put myself out there for this one!
There have been several requests for the pattern for the base hat used in the challenge. If you would like to try your hand at creating an Alice in Wonderland Themed hat start with the Red Heart Top Hat Pattern.
In Other News
I'm excited to announce that I will be blogging over at Knot Just Yarn Blog as a Guest Blogger for The Crochet Crowd. They introduced the four new bloggers yesterday that will be contributing to the blog.
New Guest Bloggers For The Crochet Crowd
The Tennessee Stitch - Daniele Dyer (She has already been contributing for about a year)
Untangling The Yarn - Bobbie Asche
Chit & Chat with Anabela - Anna Zetterberg
Hooked on Ewe - Sheri Goad
My first blog as a guest blogger was posted today. Check it out and find out what your crochet personality is.
What Kind of Hooker Are You? Crocheter Personality Comparisons
Casting off until the next time we hook up,
Sheri
Monday, November 25, 2013
Striped Elf Hat Pattern
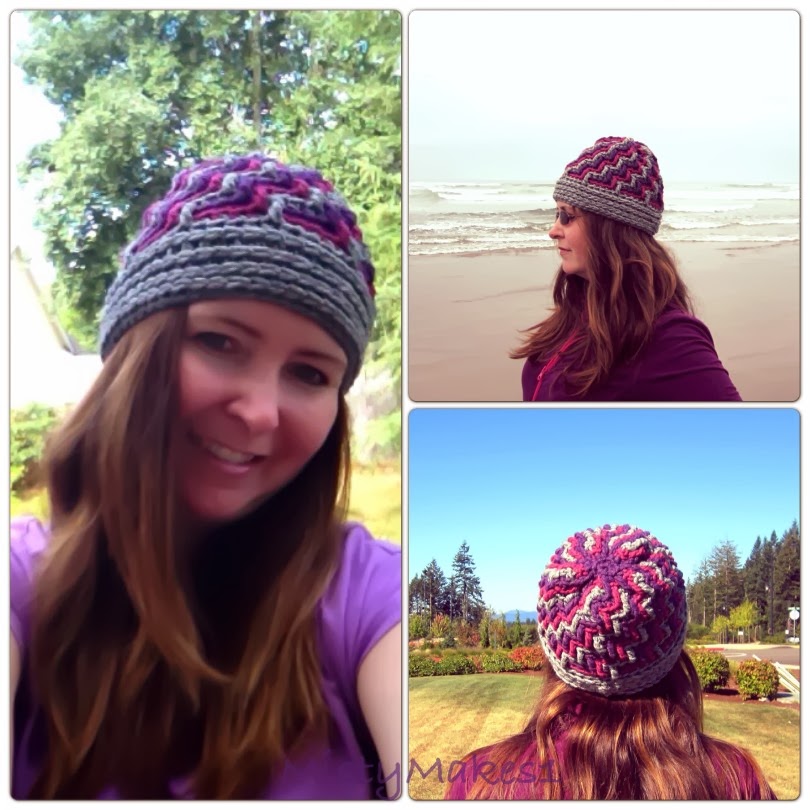
I made this hat for my son to wear to "Hat Day" at school. I was asked about the pattern, and since I didn't follow a pattern I said I would write up what I did. So here it is. Please share with me if you use the pattern. I would love to see how it turns out! On the down side, as this hat is hot off the hook today, so is the pattern. It hasn't been tested yet. If you find something that doesn't quite make sense, or any other issue, feel free to contact me! This size is large enough to fit a female adult, but fits loosely but not too loose on my 10 year old.
Happy Crocheting!
Sheri
Striped
Elf Hat
By
Sheri Goad
(Edited to Add: The fur around the brim is created by using a combined strand of Red Heart White and Bernat Boa in white. I have also changed the last line. I used 3 rows of the white for the brim. I had only put down two. It now reads Row 64-66.)
Materials
Less than
half skein of each:
Red Heart
Super Saver:
Cherry Red,
Glowworm, White
(Any
Worsted Weight in your choice
of colors
will work for this pattern.)
Bernat Boa:
White
Hook Size:
I
Tapestry
Needle
Gauge
4 rows = 2”
6 stitches = 2”
Row 1: Magic Ring, Ch 2, 9 DC Join (9)
Row 2: 1 DC in each stitch around. Join. Ch 2.
Row 3: 1 DC in each stitch around. Join with Red, Ch 2 .
Row 4: 1 DC in each stitch around. Join. Ch 2.
Row 5: 1 DC in each stitch around. Join with Green, Ch 2 .
Row 6: 1 DC in each stitch around. Join. Ch 2.
Row 7: 1 DC in each stitch around. Join with Red, Ch 2 .
Row 8: 1 DC in each stitch around. Join. Ch 2.
Row 9: 1 DC in each stitch around. Join with Green, Ch 2 .
Row 10: 2 DC in first stitch, 1 DC in next two stitches. Repeat around. Join. Ch 2. (12
Row 11: 1 DC in each stitch around. Join with Red, Ch 2 .
Row 12: 1 DC in each stitch around. Join. Ch 2.
Row 13: 1 DC in each stitch around. Join with Green, Ch 2 .
Row 14: 1 DC in each stitch around. Join. Ch 2.
Row 15: 1 DC in each stitch around. Join with Red, Ch 2 .
Row 16: 1 DC in each stitch around. Join. Ch 2.
Row 17: 1 DC in each stitch around. Join with Green, Ch 2 .
Row 18: 2 DC in first stitch, 1 DC in next two stitches. Repeat around. Join. Ch 2. (16)
Row 19: 1 DC in each stitch around. Join with Red, Ch 2 .
Row 20: 1 DC in each stitch around. Join. Ch 2.
Row 21: 1 DC in each stitch around. Join with Green, Ch 2 .
Row 22: 1 DC in each stitch around. Join. Ch 2.
Row 23: 1 DC in each stitch around. Join with Red, Ch 2 .
Row 24: 1 DC in each stitch around. Join. Ch 2.
Row 25: 1 DC in each stitch around. Join with Green, Ch 2 .
Row 26: 2 DC in first stitch, 1 DC in next
Row 27: 1 DC in each stitch around. Join with Red, Ch 2 .
Row 28: 1 DC in each stitch around. Join. Ch 2.
Row 29: 1 DC in each stitch around. Join with Green, Ch 2 .
Row 30: 1 DC in each stitch around. Join. Ch 2.
Row 31: 1 DC in each stitch around. Join with Red, Ch 2 .
Row 32: 1 DC in each stitch around. Join. Ch 2.
Row 33: 1 DC in each stitch around. Join with Green, Ch 2 .
Row 34: 2 DC in first stitch, 1 DC in next four stitches. Repeat around. Join. Ch 2. (24)
Row 35: 1 DC in each stitch around. Join with Red, Ch 2 .
Row 36: 1 DC in each stitch around. Join. Ch 2.
Row 37: 1 DC in each stitch around. Join with Green, Ch 2 .
Row 38: 1 DC in each stitch around. Join. Ch 2.
Row 39: 1 DC in each stitch around. Join with Red, Ch 2 .
Row 40: 1 DC in each stitch around. Join. Ch 2.
Row 41: 1 DC in each stitch around. Join with Green, Ch 2 .
Row 42: 2 DC in first stitch, 1 DC in next five stitches. Repeat around. Join. Ch 2. (28)
Row 43: 1 DC in each stitch around. Join with Red, Ch 2 .
Row 44: 1 DC in each stitch around. Join. Ch 2.
Row 45: 1 DC in each stitch around. Join with Green, Ch 2 .
Row 46: 1 DC in each stitch around. Join. Ch 2.
Row 47: 1 DC in each stitch around. Join with Red, Ch 2 .
Row 48: 1 DC in each stitch around. Join. Ch 2.
Row 49: 1 DC in each stitch around. Join with Green, Ch 2 .
Row 50: 2 DC in first stitch, 1 DC in next four stitches. Repeat around. Join. Ch 2.
Row 51: 1 DC in each stitch around. Join with Red, Ch 2 .
Row 52: 2 DC in first stitch, 1 DC in next four stitches. Repeat around. Join. Ch 2.
Row 53: 1 DC in each stitch around. Join with Green, Ch 2 .
Row 54: 2 DC in first stitch, 1 DC in next four stitches. Repeat around. Join. Ch 2.
Row 55: 1 DC in each stitch around. Join with Red, Ch 2 .
Row 56: 2 DC in first stitch, 1 DC in next four stitches. Repeat around. Join. Ch 2.
Row 57: 1 DC in each stitch around. Join with Green, Ch 2.
Row 58: 1 DC each stitch. Join. Ch 2.
Row 59: 1 DC in each stitch around. Join with Red, Ch 2 .
Row 60: 1 DC each stitch. Join. Ch 2.
Row 61: 1 DC in each stitch around. Join with Green, Ch 2 .
Row 62: 1 DC each stitch. Join. Ch 2.
Row 63: 1 DC in each stitch around. Join with White and White Boa together. Ch 2 .
Row 64-66 1 DC in each stitch around. Join. Tie off after last round and weave in ends.
Make a Pom-Pom using the White and White Boa yarn. Attach to the end of the hat.
©2013 Frogging Along/ Sheri Goad This pattern may not be sold or duplicated. You may sell the items you make from this pattern. Online, please link back to the pattern. Thank You!
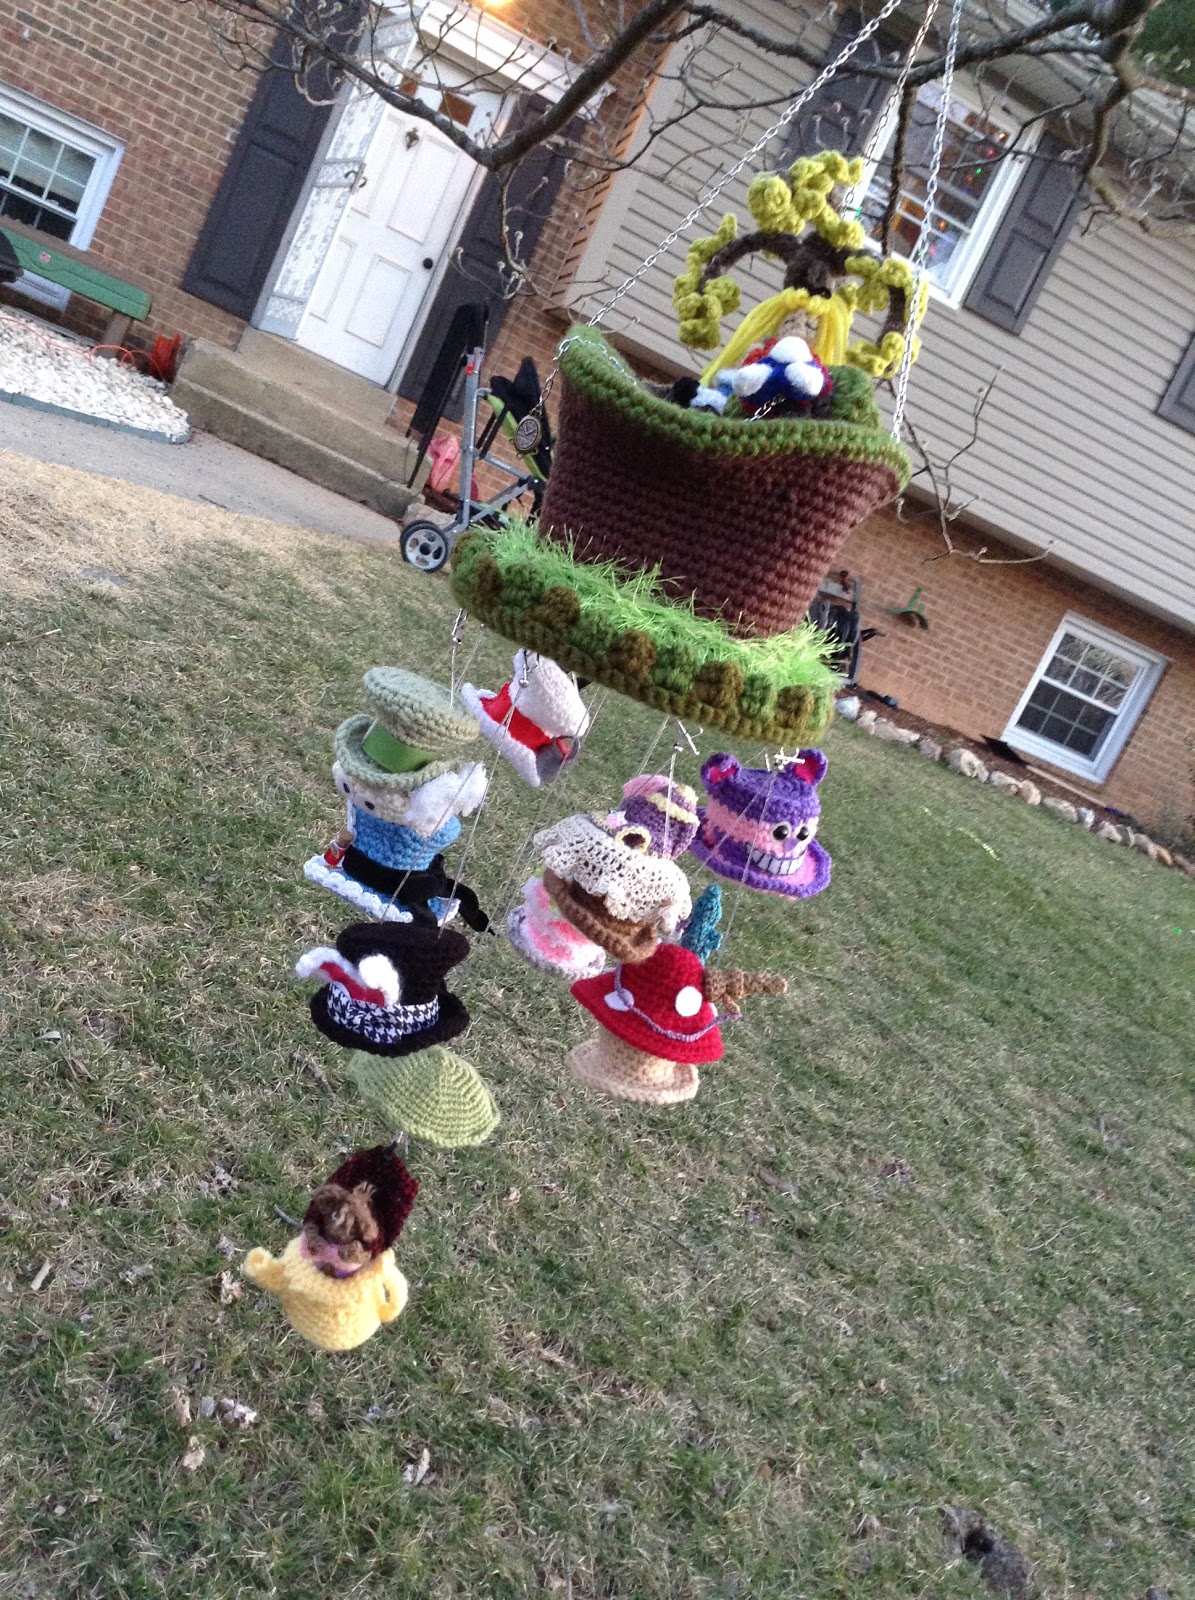
Wednesday, October 2, 2013
Pattern Testing: Is it for You?
This week I came across a designer who was looking for pattern testers. It just happened I scrolled past the request at just the right time. The first three to post with an email address would be sent the pattern to test. Several responded to the post, but only two others had left emails, so I quickly added mine and was excited to get the email from Kara Gunza, Petals to Picots, with the test pattern for this adorable Teether Lovey. Here's my test project.
Edited to add: Pattern Now Available
Have you ever thought about testing patterns? You will need to understand how to read a pattern and be willing to give feedback. Reliability and communication are musts. I spoke with both Kara Gunza from Petals to Picots and Sonya Blackstone from Beautiful Ducklings about what designers expect from testers.
What do you look for in pattern testers?
Kara: Mostly dependability and someone who can clearly communicate any errors or problems.
Sonya: Someone with experience reading patterns, that is reliable and can meet the deadline. The testers definitely need to be able count stitches so they can tell me if my count is off.
Do you have a group of testers you use regularly, or do you post as needed?
Kara: I do not. I usually put a post on Facebook and choose the testers on a "first come, first chosen" basis.
Sonya: I post as needed, gives everyone a chance to offer, although I have had a few bad apples, so I have considered just doing a group
What would make you use a tester more than once?
Kara: Sometimes I will ask a tester to test if I think they would have a particular interest in a pattern I am working on. For instance, if I remember someone recently had a new baby and I have a baby item to test, I might ask them first.
Sonya: I would use a tester more than once if they were reliable! Easy to communicate with!
What would make you never use a tester again?
Kara: I would never use a tester again if they were unreliable. I do understand that sometimes life gets in the way of deadlines, but if they don't communicate with me about the delay, then I probably wouldn't use them again.
Sonya: I have a few testers I would never use again because they received my pattern and then the next day they would message me with some thing like "Oh sorry my kids are sick" "something came up" or they would test halfway and get bored with the project and quit and just stop communicating.
Any advice you would give someone who is testing out a pattern for you or any other designer?
Kara: Just be yourself ... trust your skills and instincts. And keep the designer in the loop with any problems.
Sonya: Don't sign up to test if you can't actually get it done! Most patterns only take a couple of hours in total to complete...most testers give 48 hours..that's plenty of time to sneak in time to complete it! Don't offer if you're not 100% sure that you can get it done and provide feedback! BE RELIABLE!! COMMUNICATE!
Testing patterns can be fun, and can benefit both the designer and you. Before you sign up, be sure you will have the time to follow through, the supplies needed, and the skills for the pattern level. And most importantly, remember the designer is trusting you with their design. You should never publish or share the pattern or details of the pattern.
Happy Testing!
Wednesday, September 25, 2013
And The Results Are In
The My Mountain Hat Design Contest Results are in and...
THIS is how I'm feeling!
BECAUSE of this....
My Mountain top 5 Finalists!
"Congratulations to our 5 finalists in the My Mountain hat design contest!
|
Sheri Goad for "Fusion" 2,819 votes
Rohn Strong for "Greer" 1,994 votes
Sonya Blackstone for "Mount Katahdin" 1,764 votes
Lars Rains for "Norwegian Sleeping Cap" 1,729 votes
Susan Anderson for "Woven Ladder" 1,461 votes
These finalists will receive an iPad Mini, Ravelry ad featuring their design and expanded features on mymountain.us and social media. The semifinalist and finalist patterns will be published on mymountain.us as free downloads sometime in October. We'll let you know the moment they're up!
As the top vote-getter, Sheri's pattern, "Fusion," will become a paid Ravelry download with all proceeds going to her selected nonprofit, St. Baldrick's for Childhood Cancer Research.
Thank you so much to EVERYONE who participated in this very exciting contest. Remember, you can see more of the entries on the My Mountain Pinterest page. Look for more cool stuff coming from the My Mountain movement very soon!"
Is my hat the "best" hat in the competition...for some, not so much for others. We all have different likes and dislikes, but isn't that the way it should be? How boring would life be if we all liked the same things?! Isn't that kind of what My Mountain is trying to do is start a movement where people can create something that reflects who they are?
I came across a comment where the person said, "I do not understand how the hat in the lead...is in the lead."
My answer, because I promoted it. Far and wide. I invited my friends, who in turn invited their friends, who in turn invited their friends and more! Rock the Vote was only one way we, and I say we because NO WAY did I do this myself, spread the word. Besides the 166 attending this event, there were more of the 1,970 that didn't click on join but voted and shared daily. (The top two names on the list of invited but not joined are my son and my mother! You know they were voting.)
This was not the only means of spreading the word. Friends sent out daily messages, to those who wanted to be on a texting list with the link and reminders to vote, as well as emails. Along with other designers in the competition, we posted on crocheting boards we are involved with. Posts went up on local community boards where people within my community rallied in support.
I don't think it hurt that I designed a hat that was fun, different and gave somewhere for that darn ponytail to go! Something that could easily support the idea behind My Mountains grass-root movement...offering a simple design that even the newest crocheter could accomplish, leaving endless possibilities to those more experienced to embellish. Even if it wasn't for everyone. =)
I look forward to trying out some of the other amazing designs. Keep your eye on the My Mountain Facebook page, while the top 18 designs will be released in October, others who did not make the top 18 are posting their patterns now! If you haven't checked out My Mountain's Pinterest, add it to your to do list. Simply inspiring!!
For all those who rallied in support of "Fusion," my hats off to you! I am blessed and truly appreciative! Beyond my "prizes" I am most thrilled at the opportunity to help out St. Baldrick's Childhood Cancer Research!
Thursday, September 19, 2013
My Two Cents
There are three days left of voting in the My Mountain Hat Design Contest, thank goodness! It has been a wild ride. I was rapidly reminded why I do not like voting competitions. Not on a public level. Though, I can't complain, because I was fully aware of what I was getting into. I got free yarn to design a hat. Free yarn, now that in and of itself was worth my time. Right? The rules were simple, request yarn, design a hat, send in a picture of said hat. Voila! said hat. (As if you don't already know what it looks like.)
Moving on...once all hats were submitted and deadline passed we got to wait while My Mountain endured the painstaking task of picking 15 finalists. They couldn't, hence the reason you are all now voting on 18 hats. So much talent!
Next on the agenda: online voting. It was supposed to be one vote per person. I was thrilled. I can get on board with that. Because of an unexpected glitch, and to keep things fair it switched to one vote, per person, per ip address, per day. YIKES! That's more than a mouthful.
Is it a popularity contest at this point? Well, kind of yes. Or maybe it is a who can bug your friends the most contest. Pretty sure we all got the same set of guidelines that said this was going to a vote. Has it been fun...ummm, no! I have probably had a friend or two drop me from their friends list, or at the very least hidden me from their news feeds. I have been posting about the contest daily, multiple times daily, my friends have come into it with me and they are doing the same, as are their friends. I have reached out to my community and asked them to help me. And they have. It is text message reminders for friends to vote. It has been a non stop effort on many parts since the moment they posted the top 18.
I have managed to stay at the top, so far. Does this mean I am the most popular? Yeah, NO. Does it mean I have the best hat in the competition? Yeah, NO. Does this mean I am obtaining votes by cheating the system? Yeah, NO. It just means right now I have the most votes. I have a lot of people in my corner who are willing to push things tirelessly. Do I believe that if this was a competition based completely on the merits of my hat I could win? Yeah, YES. But so could any of the other designs. Because they are all really good.
I will note this, if there are contests like this in the future, might I suggest My Mountain have two categories of contestants. One for crochet designs and one for knit designs. In my humble opinion, it is like judging apples against oranges.
So....the vote and the designers. As a crocheter, I was thrilled to see 5 of the 18 designs were crochet, those patterns I can try out! Here are the other 4 crochet designs. I am glad you are able to vote for more than one hat, so I can support some fellow crocheters.
![]() |
Beautiful Ducklings I love the design on this and can't wait to get the pattern so I can see how she added all those white bits in! |
![]() |
One Loop Shy Designs Sadly, what you can't see in this picture is the amazing swirl design at the top of this hat. |
![]() |
Loose-Enz Crochet What a fun yarn used in this one. Loving the colors. |
![]() |
Misty Makes I'm quite interested to see how the zig zag pattern was created on this one! |
Crochet designs aside, there are few other hats that make me go wow, and tempt me to temporarily put my hook down for a set of needles...or maybe not. But I would certainly consider purchasing these hats if I saw them in the store. My personal favorites, and they have been since the start. I told my friends I thought they would make the final 15 before the list even came out. I vote for them every day.
![]() |
Just Knots I am a sucker for nautical! I just love this. |
![]() |
Mary Kubasek Love, love, love...this is by far my most used punctuation. |
I love my hat. I am not even close to the same caliber as some of these designers, but I think I came up with a fun and original design that many people will love making and adding their own personal flair to. I'm glad I entered this contest. It has really motivated me to jump start my desire to make crocheting a more integral part of my life. It has opened my eyes to some good and some bad sides to this industry, it has inspired me, it has allowed me to meet some new people, make some new friends, and did I mention I got free yarn?!
Now go, vote for the hats you love, I did! My Mountain Hat Design Contest
Edited to add: Seems that great minds think alike, go check out Rohn Strong's blog where guest blogger Lars Rains talks about My Mountain Contest and how they are supporting each other's designs. A Different Perspective
Saturday, September 7, 2013
I'm a Semi-Finalist!
I am beside myself excited! My Mountain just announced the top 18 Semi-Finalists in their hat design contest. I was thrilled to see my hat pop up in the pictures! They are now open to voting and the public chooses the top 5! That means YOU! Please take a minute and GO VOTE!!
There will be 5 Finalists, but the top voted finalist will get their hat pattern listed as a paid pattern, and ALL proceeds from it will go to the charity of their choice!
A year ago I couldn't even read a pattern! I'm thrilled to be among so many amazingly talented designers!
There will be 5 Finalists, but the top voted finalist will get their hat pattern listed as a paid pattern, and ALL proceeds from it will go to the charity of their choice!
A year ago I couldn't even read a pattern! I'm thrilled to be among so many amazingly talented designers!
Tuesday, September 3, 2013
"Yes, I believe I was the only one at the park with a hook in my hand!"
There's nothing quite as exciting as taking the kids to an amusement park to end the summer with a bang! The kids had a blast, I'm more of a hang-out-hold-stuff-while-you're-on-the-rollercoaster kind of gal myself. Thanks to hubby's awesome football throwing skills, I was in good company!
Day One - Chillin' with Dude! |
Getting Dude in on some crochet action! |
Day Two- Hanging with Dave! |
Baby Girl Hat - Made on the way to the amusement park. Traffic was horrid! |
Chillin' by the pool! |
Black Light Hats! Definitely going to be getting more of this yarn and doing hats for the craft shows this fall! (Red Heart Black Light Yarn I used the Basic Beanie (Adult Size) Pattern |
P.S. *WAVES* to the nice lady I met at Kings Dominion and chatted about crocheting with. (Hopefully she made it here to check out the blog!) Go ahead, pick up a hook and yarn...you can do it!
Friday, August 16, 2013
Hat Crazy!!
I will openly admit I have gone a touch hat crazy! In all fairness, it's not my fault. Full blame is to be placed on the My Mountain Hat Design Contest. I first learned about the contest while searching for crochet blogs. Liz, from Crochet in Color had posted about it.
My first request was for Boston and Boston Style yarns...from these came this, my first entry. I blogged about it HERE. (There's more pics there too. I took another batch of pics in hopes of showing the pattern off more.)
I fell in love with the Boston yarns and decided to request the same yarn in different colors for my second entry. This time I requested, charcoal heather, brilliant white, black and purple. I had a fun pattern worked up and couldn't wait to try it out. This one is named "Payton" after the adorable young lady who fell in love with it when she was modeling the hats for me.
The Boston and Boston Style yarns were amazing to work with, I loved the texture of the yarn and the color choices...so many to choose from! I decided for my third entry I would request something in a super bulky weight. I thought they were 100g so needing about 225g to finish the next pattern I had worked up I requested 3 skeins. This time I simply asked for three of the same color, any color, and waited anxiously to see what surprise would come in the mailbox. SURPRISE! I got Neon Pink Marl in the Bravo Big. DOUBLE SURPRISE! Each skein had 200g! With 600g of Super Bulky yarn, there was enough to make my third, fourth and fifth entry!
Entry #3 is called "Duplicity" With an open back and drawstring this hat can be used much like my first entry, "Fusion" the difference is the opening is wider and "Duplicity" can double as a cowl. Using such a bulky yarn, this hat worked up in just about an hour and a half.
Entry #4 is called "Flirty" Since the hat needed to be made in all Schachenmayr yarn, and I didn't have time to request anymore, I took advantage of the extra I had. Using about 3 yards of yarn and separating the strands, I made the flower and gray and white band that weaves in and out around the hat. They are the perfect color match!
Entry #5 is "Bobble" using a basic pattern, I added a bit of zing to this bobble style hat by using some of the Boston Black yarn I had left over from my second entry.
Entry #6 "Belle" is a petite hat made from bits of Boston and Boston Style yarns left over from entries one and two.
It's been a fun month of going hat crazy...I'd be lying if I said it was going to end here...I have already done up two non-contest hats. One replicating the "Flirty" hat in a less bulky yarn and a chemo hat for a friend of mine.
Monday, August 5, 2013
My Mountain Hat
I did it! Here's my entry for the My Mountain Hat Contest. Crosses fingers tightly. =) The name "Fusion" is from a mix of fun and functionality. With fun colors and designs, "Fusion" sports an open ended hat perfect for pulling a ponytail through. A drawstring feature allows you to pull the back together or leave it open for a fuller fun effect. The options of how to wear this hat are really up to the individual sporting it. A quick flip of the bottom and drawstring pulled tight and you have a beanie with a festive spray of braids on top!
Part of the contest was talking about the mountains you have overcome. I am somewhat a Jill of all Trades. I have tried many crafty type things and hobbies, never really sticking to any of them. With crocheting it has been completely different.When I started a few years ago I was terrified of doing anything using a pattern. Straight, non counting projects for me. In the last year I began climbing that mountain one pattern at a time. Now I'm making my own patterns! The My Mountain Hat Design Contest gave me that final motivation to take my crocheting to the next level! With my brand new blog and an insatiable desire to create with yarn, I'm over the top and quite happy to be here!
Friday, August 2, 2013
Basic Beanie Adult Hat
BASIC Beanie Hat (Adult Size)
Hook Size J
This hat works with Lion's Brand and Red Heart Yarn Worsted yarn. I used Lion's Brand for this hat.
DC - Double Crochet
HDC - Half Double Crochet
Join - (Join the end of each round by slip stitching into the top of the first Double Crochet)
Start with Magic Ring, Chain 2
Row 1: 10 DC in Magic Ring, join. Chain 2
Row 2: 2 DC in each stitch and join. Chain 2.
Row 3: 2 DC in first stitch 1 DC in next stitch, Repeat until you have come back around and join at the top of your first DC. Chain 2.
Row 4: 2 DC in first stitch 1 DC in next 2 stitches, Repeat until you have come back around and join at the top of your first DC. Chain 2.
Row 5: 2 DC in first stitch 1 DC in next 3 stitches, Repeat until you have come back around and join at the top of your first DC. Chain 2.
Row 6: 2 DC in first stitch 1 DC in next 4 stitches, Repeat until you have come back around and join at the top of your first DC. Chain 2.
Row 7 - 15: DC in each stitch around, joining and chaining 2 after each round.
Row 16: HDC in each stitch around, join and tie off.
Use a tapestry needle to weave end threads into the hat.
For the hat shown, I switched to white on Row 7 and Row 8, back to blue for three rows and back to white for Row 12 and Row 13.
The length of this hat can be adjusted by adding additional rows before you add the row of HDC.
"What's Your Mountain?"
Have you heard about the My Mountain Hat Design Contest? You pick the yarn from their selection of fun yarns and design a hat! I chose Aquatic Color from their Boston Style collection, and Neon Yellow from their Boston collection. It's a bulky yarn that's very easy to work with. My design is going to take more than originally requested so I'm waiting! More is on the way. What a fun way to jump feet first into the world of creating patterns. I'm anxious to finish this one up. With two sampler hats already finished, the final project should be just right! It was fun designing something and figuring out ways to make it better.
The theme of the contest is "What's Your Mountain?" I've had many mountains to deal with to get where I am today, but my focus is on crocheting. My personal mountain was learning to read patterns, I've come a long way baby! What a perfect tribute to overcoming that mountain...designing my own pattern. Photos of the finished hats have to be submitted by August 30th. I'll share photos of the finished projects as soon as I submit them.
So tell me, "What's Your Mountain?" crocheting or otherwise.
Thursday, August 1, 2013
Toe Cozie
Last winter a friend was tired of her toes being cold, unable to wear a shoe because of a foot injury. She created a toe cozie to go over her cast and cover her toes to keep them warm. Since, she makes them and donates them to the Walter Reed Medical center to pass out to patients. She brought the idea to our Crochet Club and we joined in the effort. Here is a simple pattern that I worked up. You can embellish them as you choose. The cozie on the left I added a fuzzy border by adding an additional row of single crochets. The sock monkey is an example how you can embellish and make your cozie original.
BASIC TOE COZIES
Hook Size J
Red Heart Yarn
DC - Double Crochet
SC - Single Crochet
Join - (Join the end of each round by slip stitching into the top of the first Double Crochet)
Start with Magic Ring, Chain 2
Row 1: 7 DC in Magic Ring, join. Chain 2
Row 2: 2 DC in each stitch and join. Chain 2. (16 stitches total)
Row 3: 2 DC, DC in next 3 stitches, Repeat 3X. Chain 2. (20 stitches total)
Row 4: 2 DC, DC in next 3 stitches, Repeat 4X Chain 2. (25 stitches total)
Row 5: 2 DC, DC in next 4 stitches, Repeat 4X Chain 2. (31 stitches total)
Row 6: 2 DC, DC in next 4 stitches, Repeat 5X Chain 2. (37 stitches total)
Row 7 - 17: DC in each stitch around, joining and chaining 2 after each round. (37 stitches each round.)
Chain stitch a long enough chain to lace through the posts of Row 17 with enough left out to gather and tie. Accessorize as you see fit!
And It All Began
My name is Sheri and I am addicted to yarn! When I was young, I watched my mom and my grandmother create the most amazing things from yarn. A favorite was this doll my mom would make when we had birthday parties to attend. The exact patterns she used then are here now! Free Vintage Crochet.
Stitch by stitch, frog by frog, I watched as they created. Grandma gave me a hook and some yarn and taught me how to do a chain stitch. She might have taught me a bit more but that was what I took away. Mom taught me how to do a single crochet and I vaguely remembered that. I was probably around 9 or 10 years old. Albeit dormant for 30 years, a seed was planted. When it decided to take root two years ago...let's just say all yarn broke loose!
Hmmm...what is it? A dish towel perhaps, a miniature doll blanket, bumpy burp cloth...no matter what it looks like, what it is, is the beginning. This is where the addiction began. I went from using a chain and single crochet to a double crochet. Nothing more than scarves and blankets requiring no patterns was good enough for me...until it wasn't. Oh Boy!
It took a while to overcome the fear of following a pattern, trying to decipher the secret codes of crocheting! DC, HDC, back loop, post, space....it might as well have been written in Greek! However, there is SO MUCH information available out there to help you overcome the silliest of fears. AND it's free, thanks to the World Wide Web.
Soon my scarves were getting a bit more interesting.
And with the help of awesome bloggers like Sarah from Repeat Crafter Me my projects started getting more fun and creative!
It wasn't long before I jumped in with both feet and started to venture into my own creations.
Here I am now, two years later starting a blog! Why? Because I want to share what I have found, what I have learned, awesome sites, videos and projects! I have recently ventured into turning my experiments into actual patterns...this too I want to share! So stay tuned, who know where this little adventure is going to lead.
Subscribe to:
Posts (Atom)